Knowledge Base Help Desk - Pro
Introduction
- Item Name : Knowledge Base Help Desk
- Author : QuantumCloud
First of all, Thank you so much for purchasing this plugin and for being our loyal customer. You are awesome!
To get priority support, please open a support ticket with us.
Any feedback or feature requests are most welcome. We will try to incorporate your valuable suggestions with our item.
About
What Knowledge Base Help Desk Pro ?
KnowledgeBase HelpDesk is an advanced Knowledge Base plugin with help desk, glossary, build in Chatbot and FAQ features all in one. KnowledgeBase HelpDesk is extremely simple and easy to use.
What Does This Kb Do?
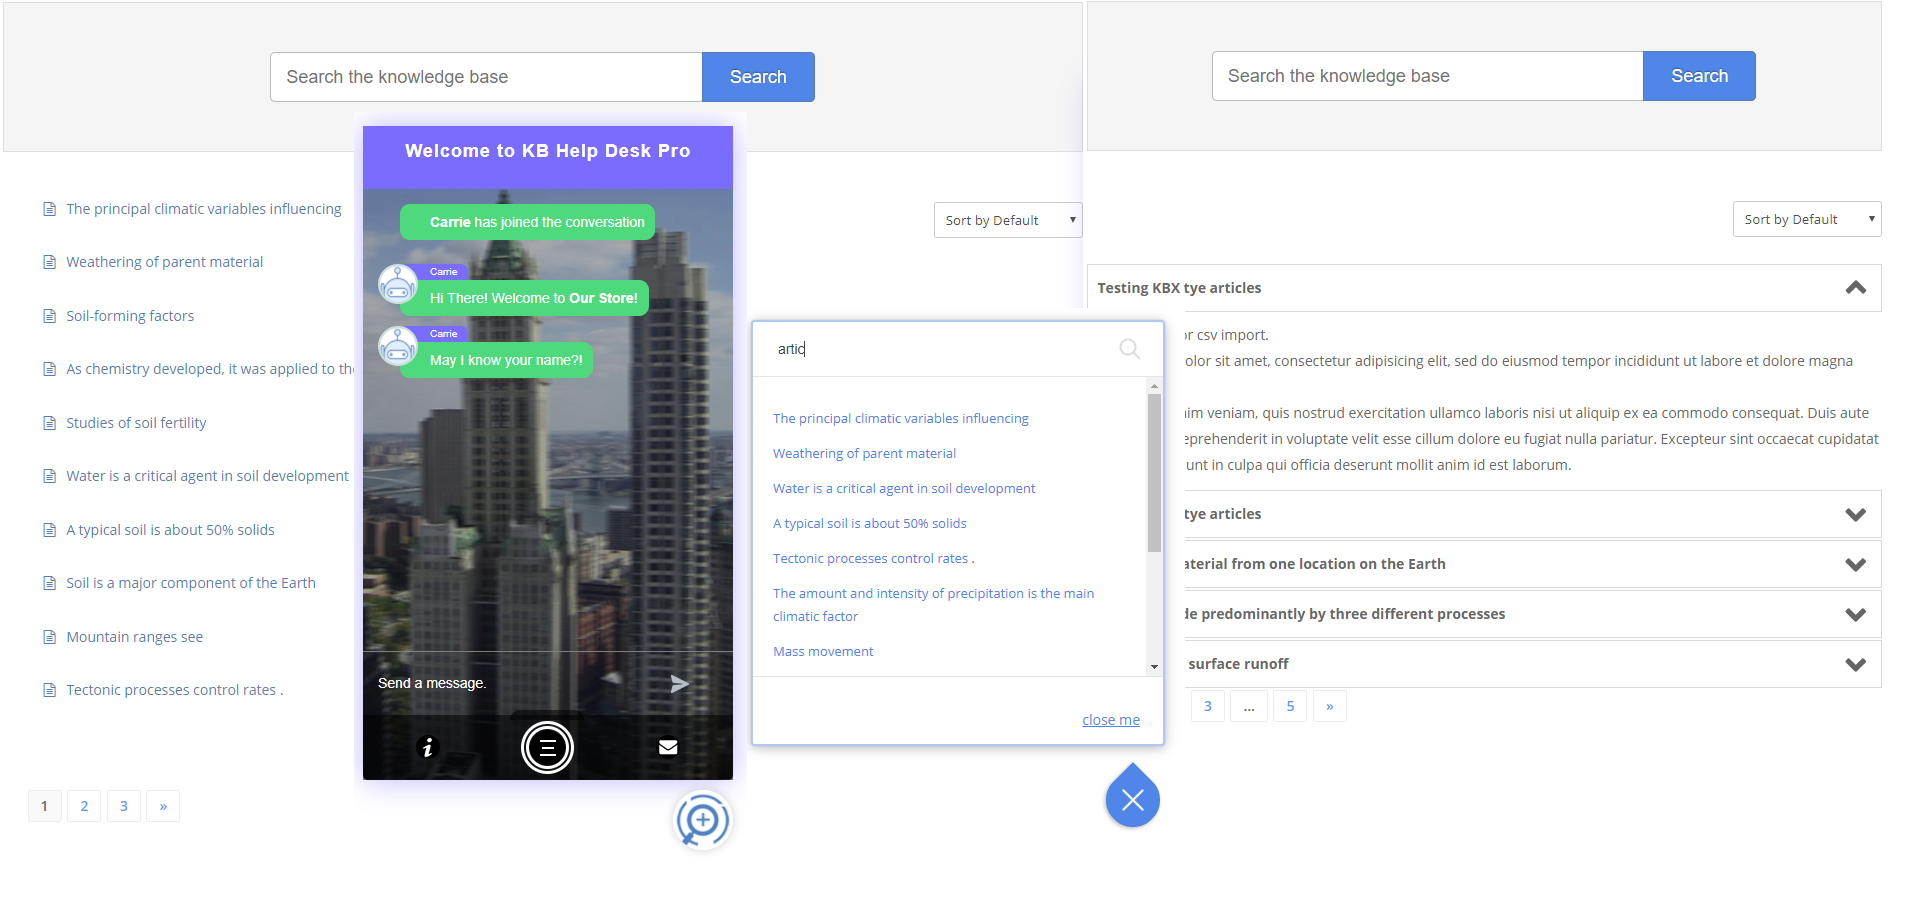
The Knowledgebase Helpdesk plugin comes with an AI like Chatbot article search & support, floating search widget with full text search and interface that acts as a one stop help desk for your website users. The search is powered by AJAX. So, this Knowledge Base / Help Desk returns more relevant results in impressive speed.
You can also add the Knowledgebase in any of your pages with a simple shortcode using Knowledgebase shortcode generator! It will generate a beautiful, responsive layout of knowledgebase categories and powerful search box.
You can also export & import of knowledgebase articles.
Knowledge Base Help Desk Pro
- Complete shop asistance through a chat conversation.
Installation And Overview Of Features
You can install "knowledgebase-helpdesk-pro" plugin by following some simple and easy steps.
Please find 'knowledgebase-helpdesk-pro.zip' file inside your downloaded package and install it following the steps below: -
From your WordPress dashboard:
- Visit 'Plugins > Add New'
- Click on 'Upload'
- Click on 'Browse' button and then select 'knowledgebase-helpdesk-pro.zip' from file upload window
- Then click 'Install Now' button. The plugin will be installed within some moments.
- Then click 'Activate Plugin' link to activate the installed 'Knowledge Base Help Desk Pro' plugin.
Manual Installation:
- 'Upload / Copy' 'knowledgebase-helpdesk-pro.zip' file to your 'wp-content\plugins' folder
- Unzip the 'knowledgebase-helpdesk-pro.zip' file
- Visit 'Plugins -> Installed Plugins' from your site dashboard
- Find 'Knowledge Base Help Desk Pro' in the plugins list, and activate it by clicking on 'Activate' link
Important: Only follow the upgrade section if you want to upgrade your plugin from free version to premium version. Otherwise please ignore this UPGRADE section below.
HOW TO UPGRADE FROM FREE VERSION
To upgrade your "Knowledge Base Help Desk Pro" plugin from FREE version to PREMIUM version please follow the below steps:
- Download the latest pro version of the plugin from website
- Log in to your WordPress admin area and go to the Plugins management page.
- Deactivate and Delete the old version of the plugin .
- Upload and Activate the latest pro version of the plugin
- You are done.
Getting Started
After installing 'Knowledge Base Help Desk Pro' plugin, you can configure plugins as below -
Simple Steps to get Started:
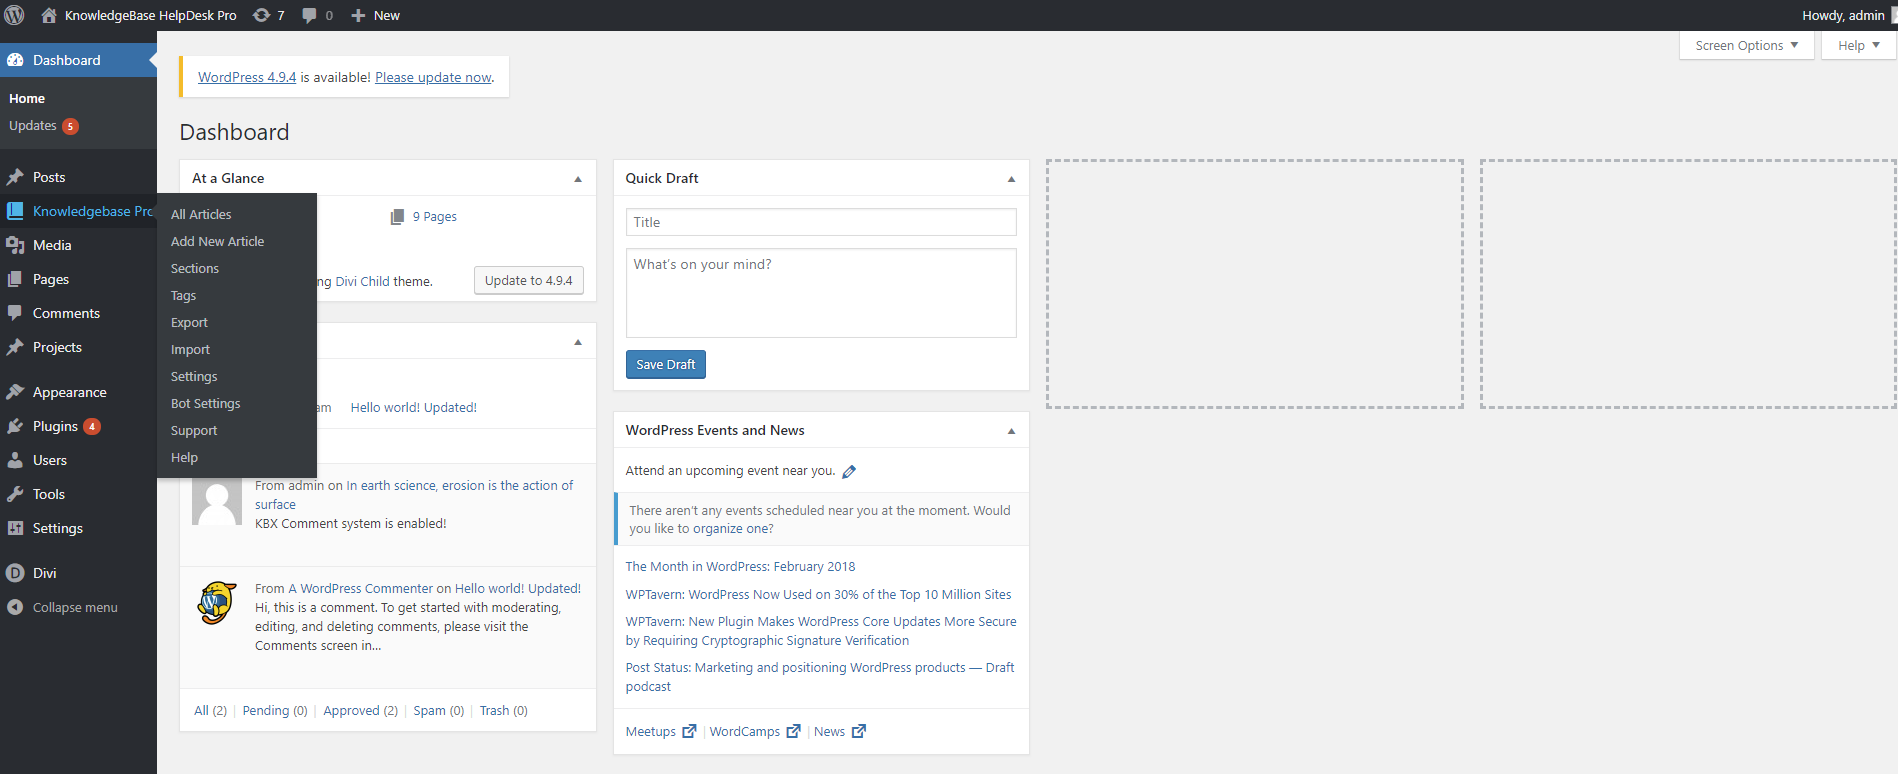
- After you have installed the plugin, a new menu named "Knowledgebase Pro" will be appeared in WordPress admin menu.
-
Go click or mouseover on Knowledgebase Pro to view following sections.
- For more details please see below sections
1. ALL ARTICLES
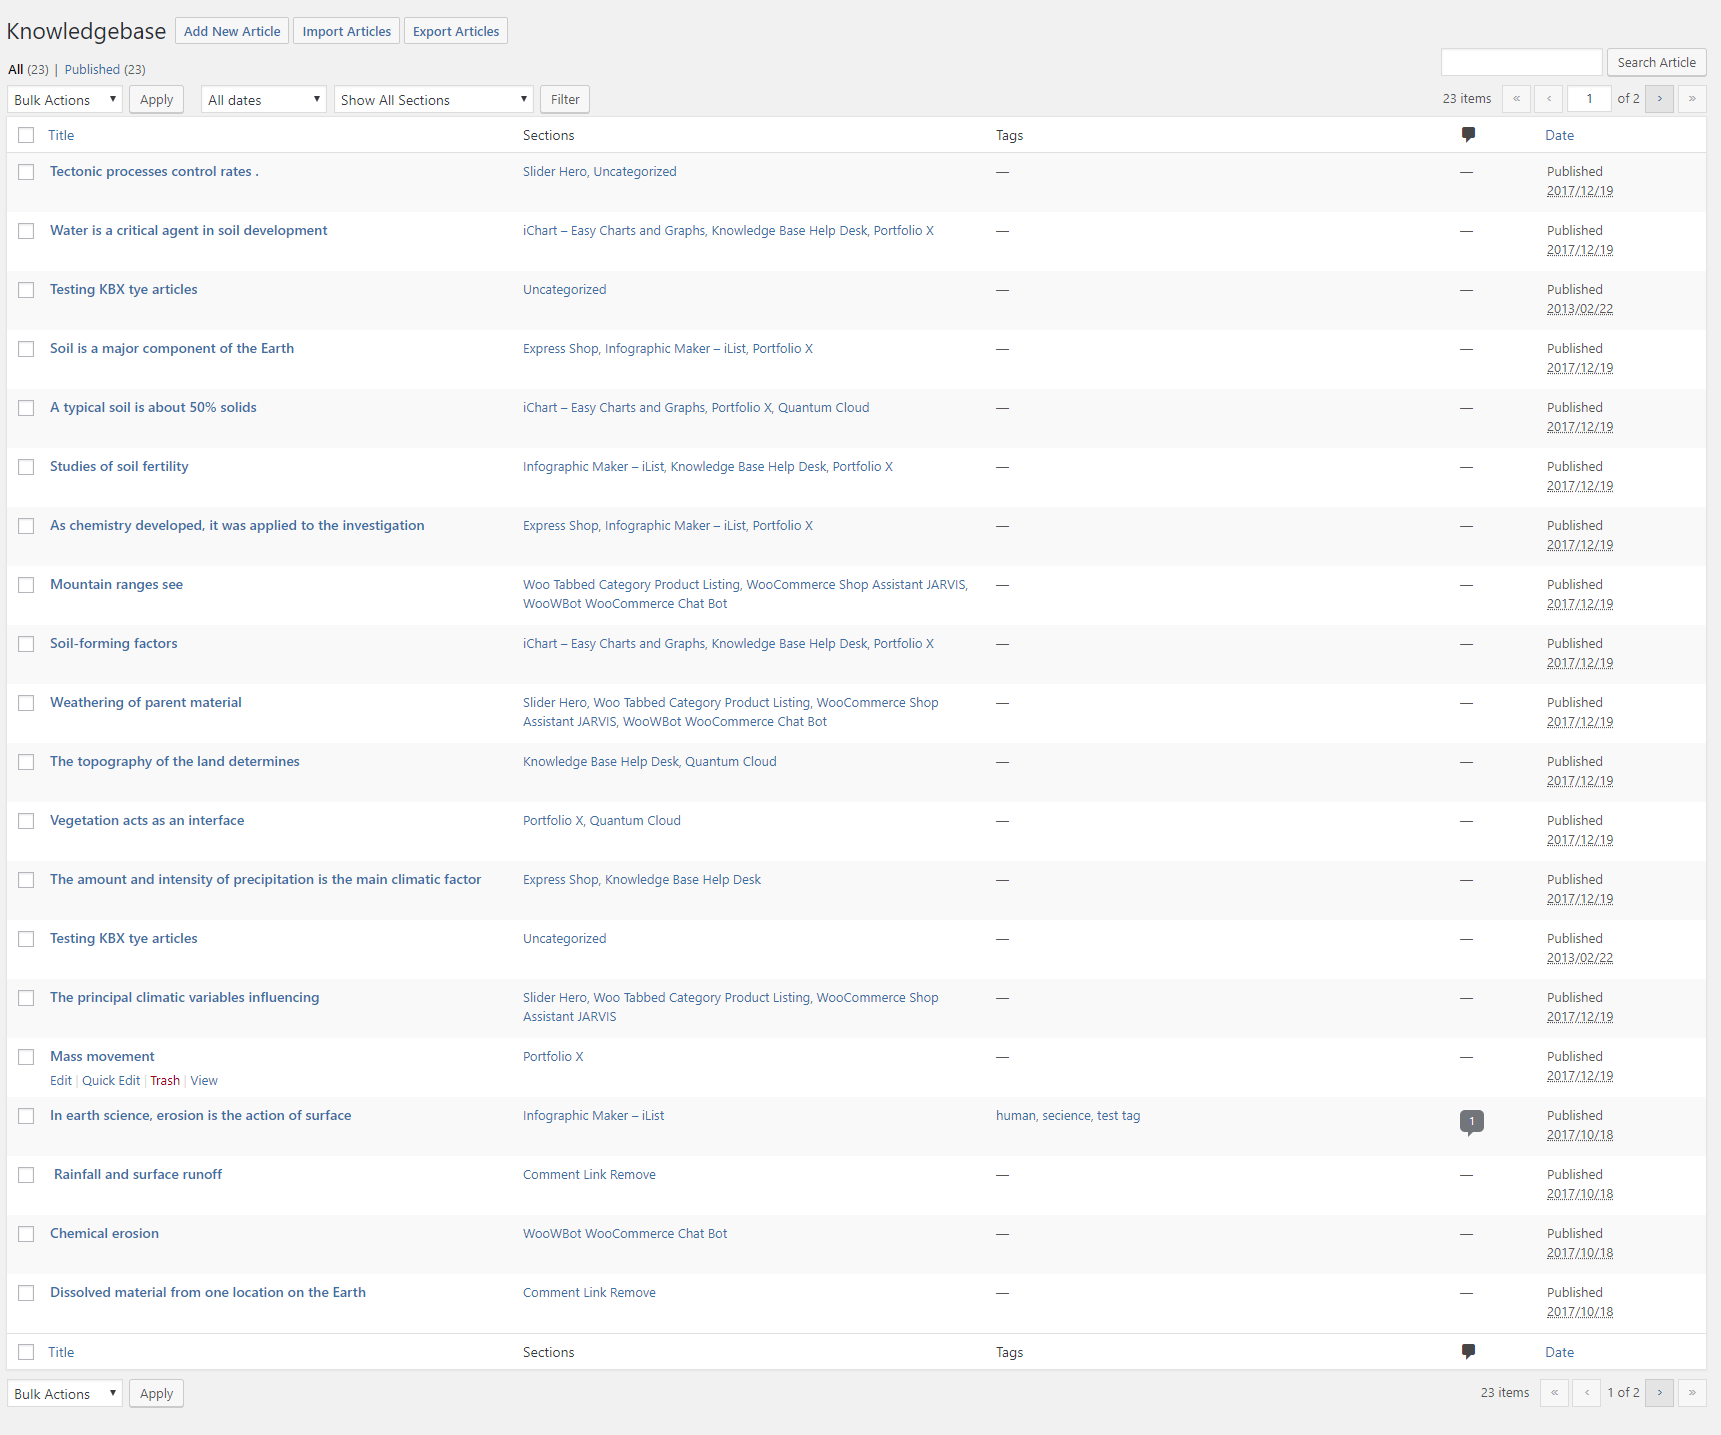
In the Articles list, almost every things like WordPress posts list page. Some extra option are
- Export - Button will redirect to KnowledgeBase articles exporting admin page.
- Import - Button is for importing KnowledgeBase articles list from CSV file.
- Filter by date To filter KnowledgeBase articles list by date where 'All dates' is default option.
- Filter by Section 'Show All Sections' is defualt option to filter KnowledgeBase articles list .
2. ADD NEW ARTICLES
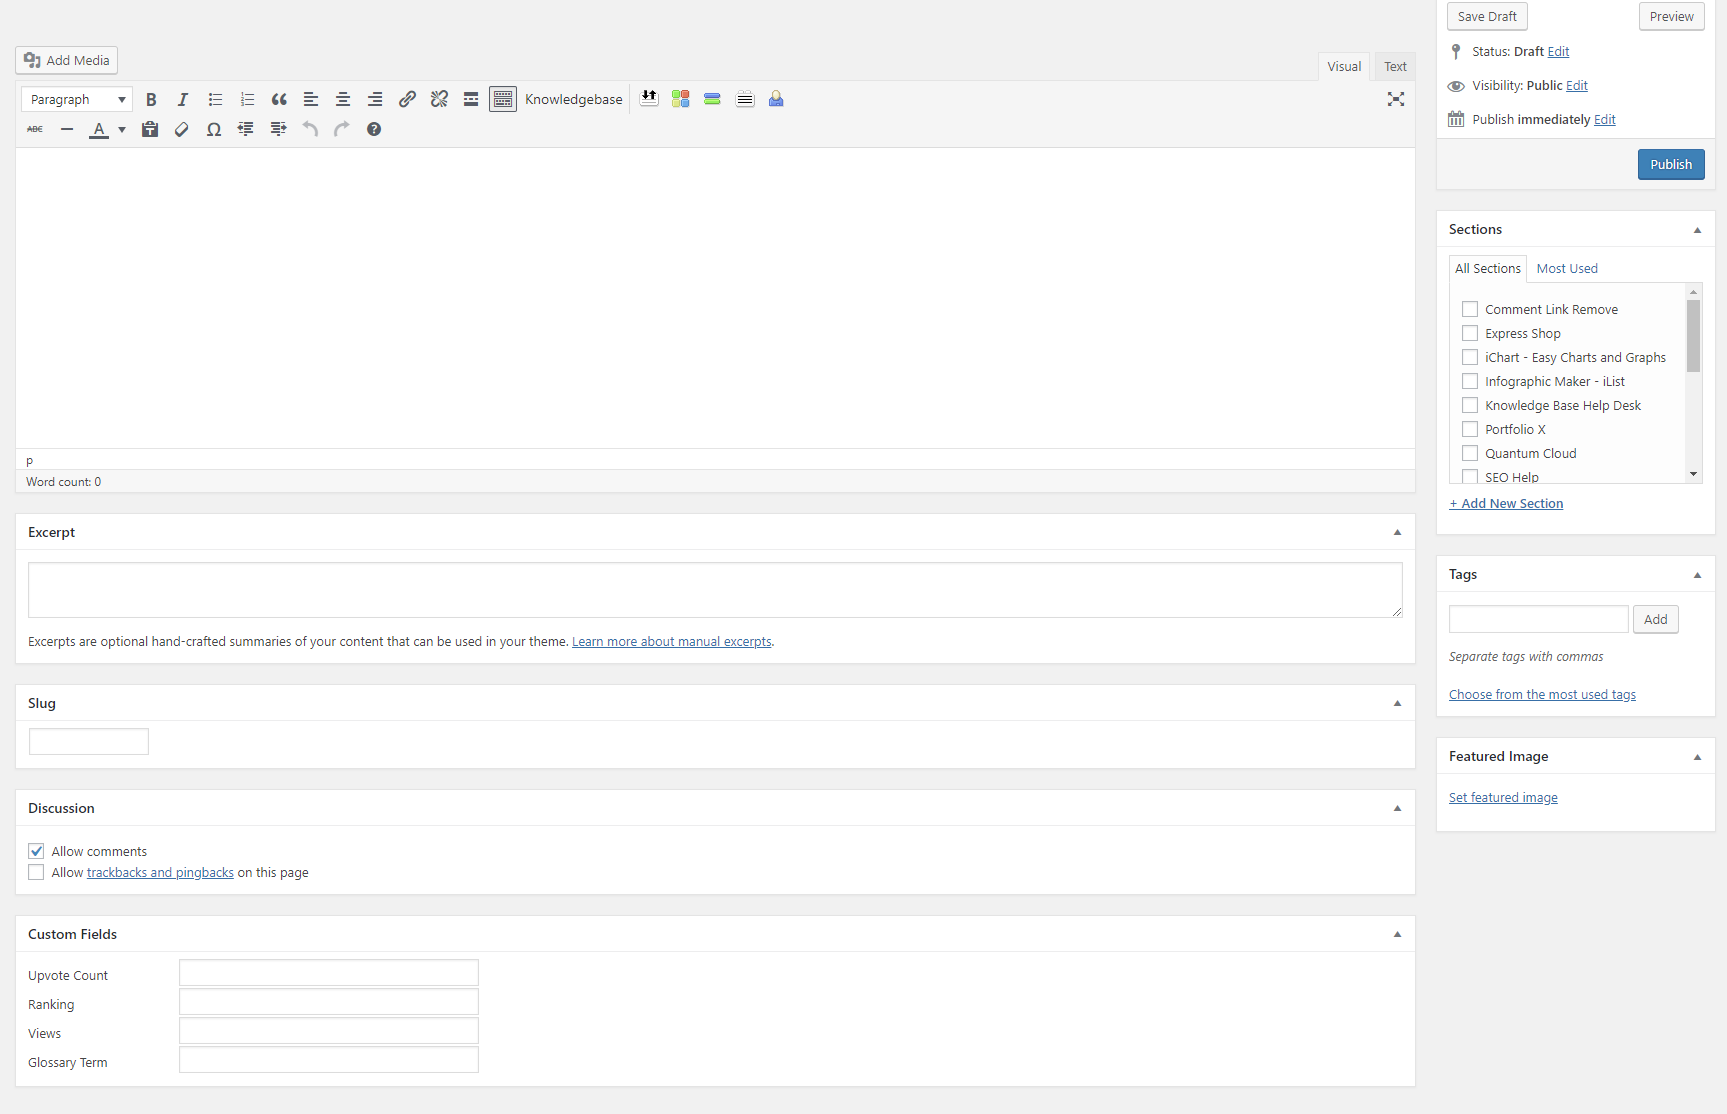
In the New Add Article is like WordPress add new post UI. Some custom fields , Custom Metas & Custom Taxonomies are additional
- KnowledgeBase Shortcode Generator is on the editor tool menu after Toolbar Toogle button.
- Sections Aritcle's categories option like WordPress categories.
- Tags Aritcle's Tags option such as WordPress Tags.
- Excerpt The summery or short description of the article.
- Slug Using this optin, article slug can be modified.
- Discussion if it is check marked, then user can comments on the article.
- Upvote Count To count the user given votes for the aritcle , where you can edit & update.
- Ranking
- Glossary Term To bring articles under same terms on the Glossary shortcode for KnowledgeBase articles in frontend
- Views This is an automatical article view counter option.
3. SECTIONS
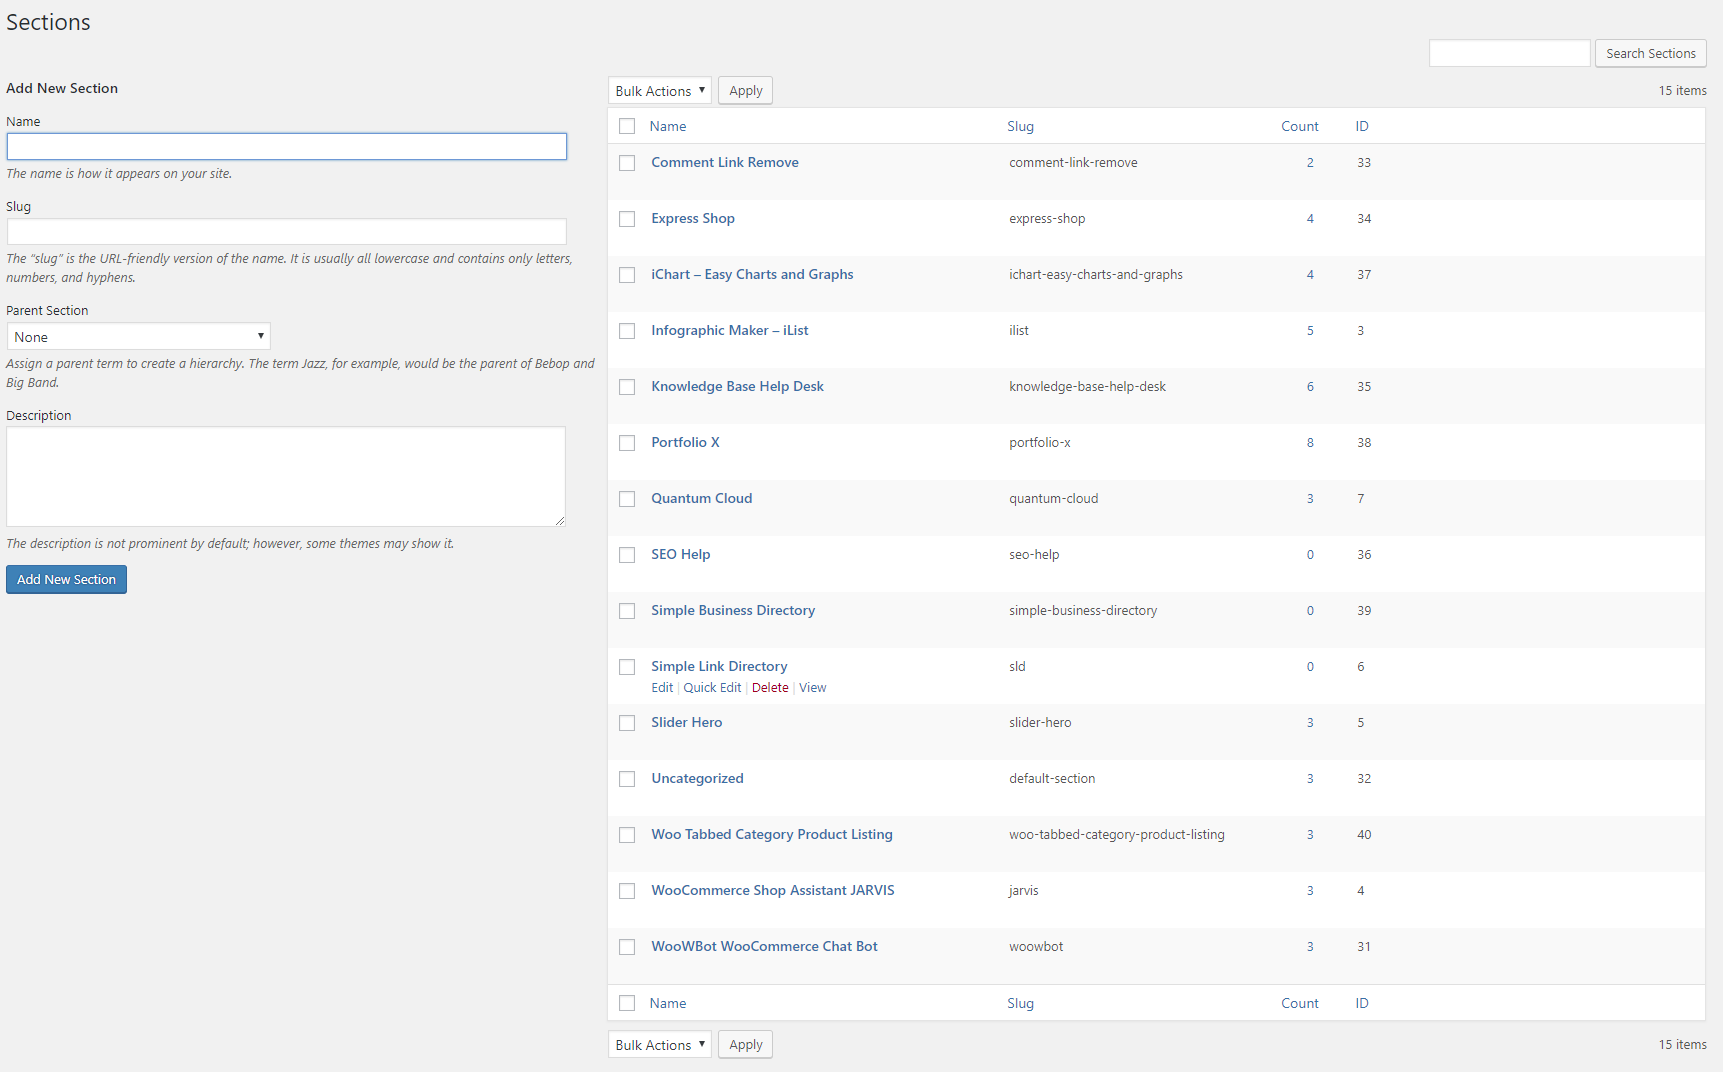
Sections is one of the pre-defined taxonomies for KnowledgeBase article post type . It is used to sort and group articles into different sections. A website publishing articles on a variety of topics can divide their website into sections using sections just like WordPress post categories.
In the Sections Window, two parts are
- Add New Section At the left side to create new category for KnowledgeBase article
- Sections List Sections grid for KnowledgeBase articles at the right side.
4. TAGS
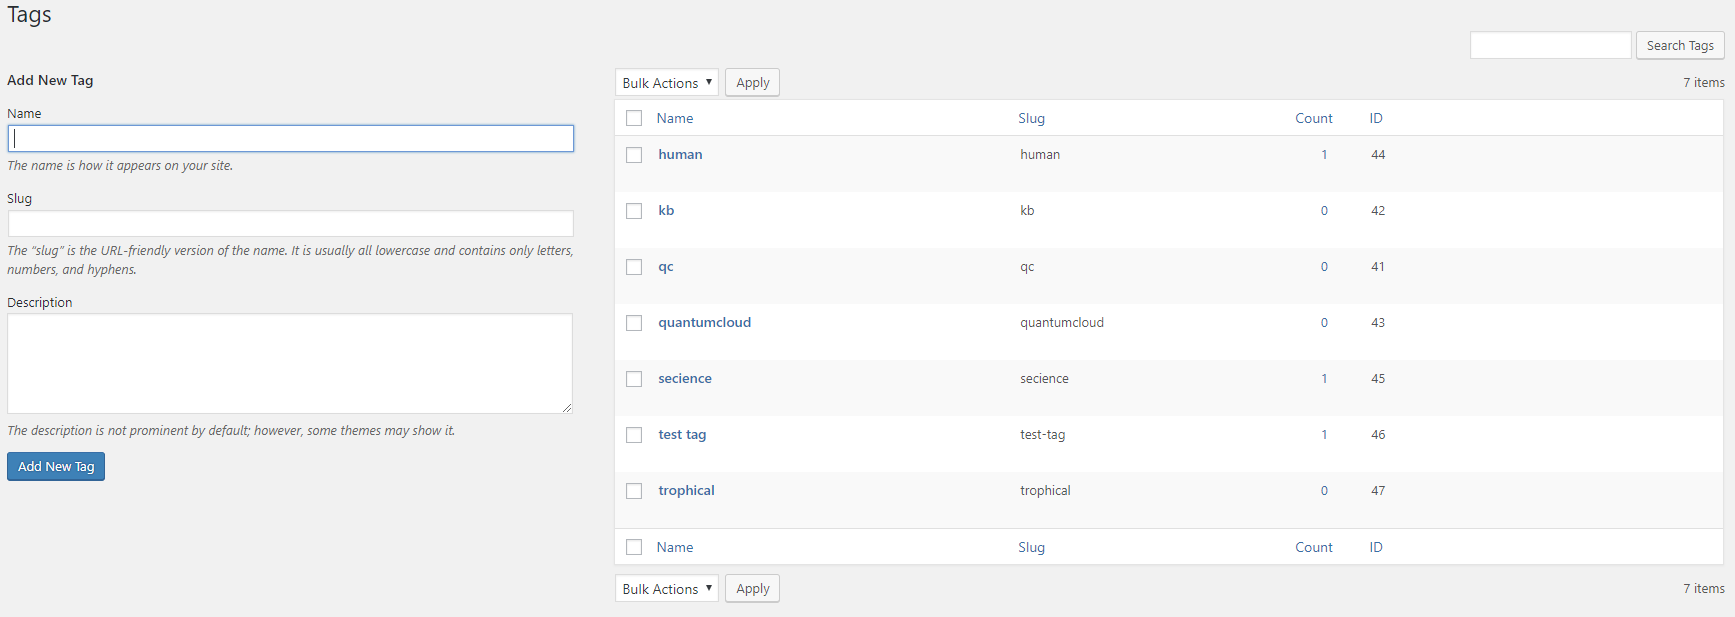
Tag is one of the pre-defined taxonomy for KnowledgeBase article post type. Users can add tags to their KnowledgeBase article along with sections. However, while a section may cover a broad range of topics, tags are smaller in scope and focused to specific topics. Think of them as keywords used for topics discussed in a particular aritcle.
In the Tags Window, there are two parts
- Add New Tag At the left side to create new tag for KnowledgeBase article
- Tags List Tags grid for KnowledgeBase articles at the right side.
5. EXPORT ARTICLES
The KnowledgeBase articles Export features generate CSV (Comma-Separated Values) file as input from the multi select optins where defualt is all columns.

Generated CSV file containing following fields.
- ID
- Publish Date
- Author
- Title
- Published
- Short description
- Description
- Sections
- Tags
- Parent
- Article Slug
- Comments Status
- Upvote Count
- Ranking
- Views
- Glossary Term
6. IMPORT ARTICLES
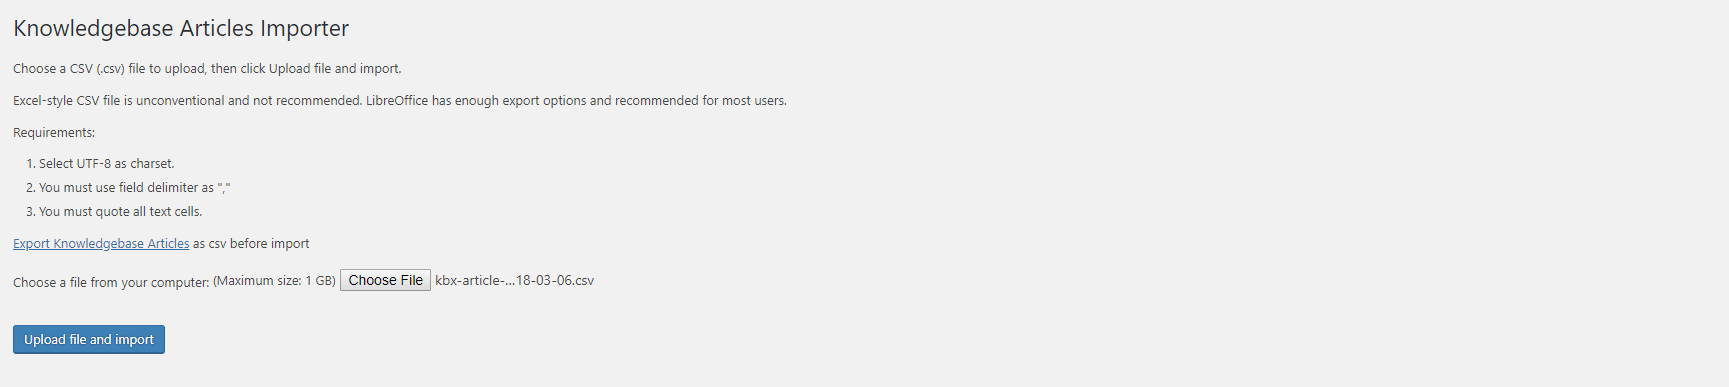
The KnowledgeBase articles Import feature need CSV (Comma-Separated Values) file as input. You must create a CSV ( UTF-8 Encoded ) file and enter the article details in a structured format . This is to match each field of CSV file to the field of a particular article that otherwise Admin need to input manually. For example: the Article Slug field gets mapped to the article slug of the aricle. To import correctly, you must map headers of all of the column correctly and you must ensure that all of the fields you enter must be in the correct format.
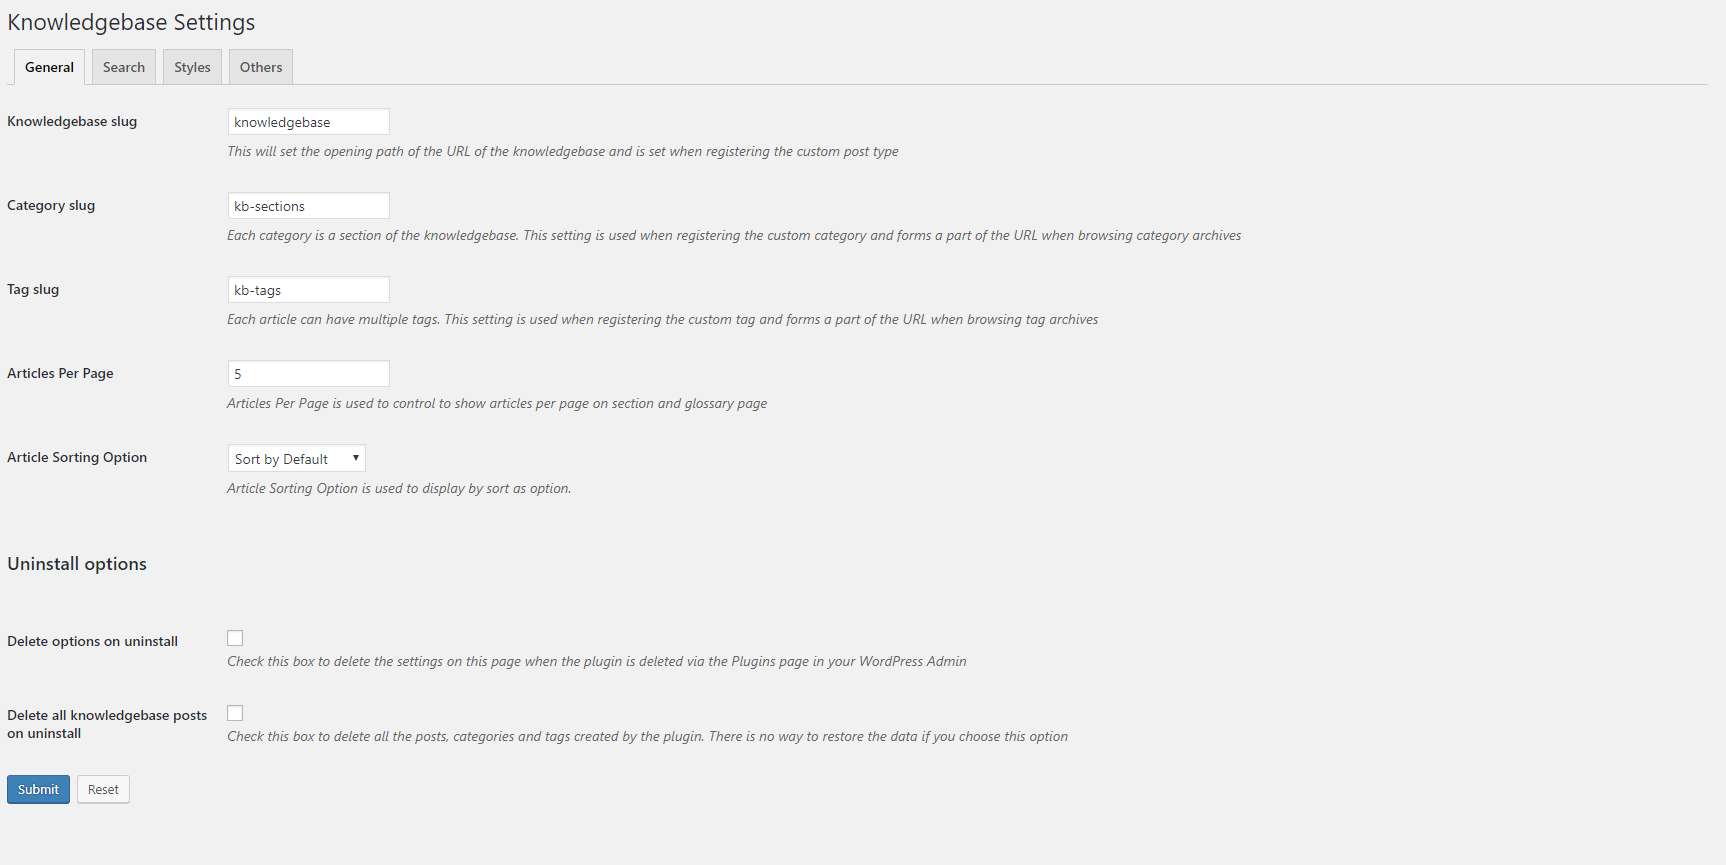
7. SETTINGS
7.1. General
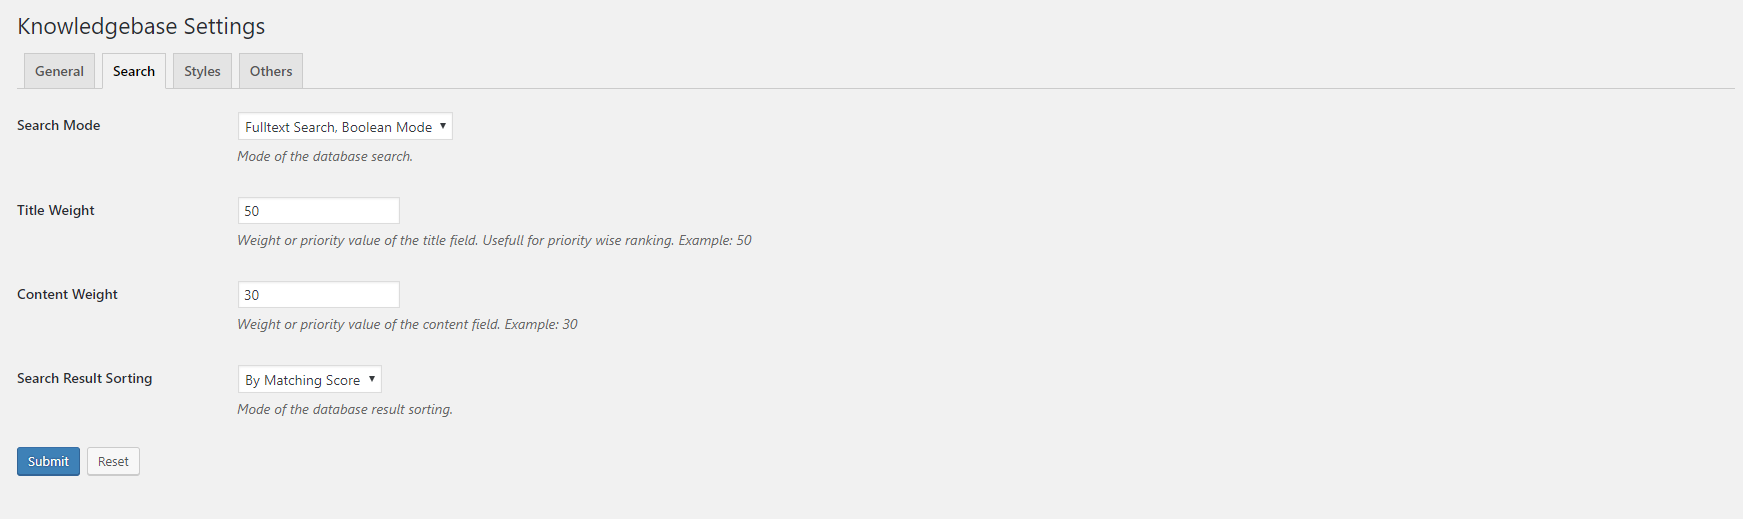
7.2. Search
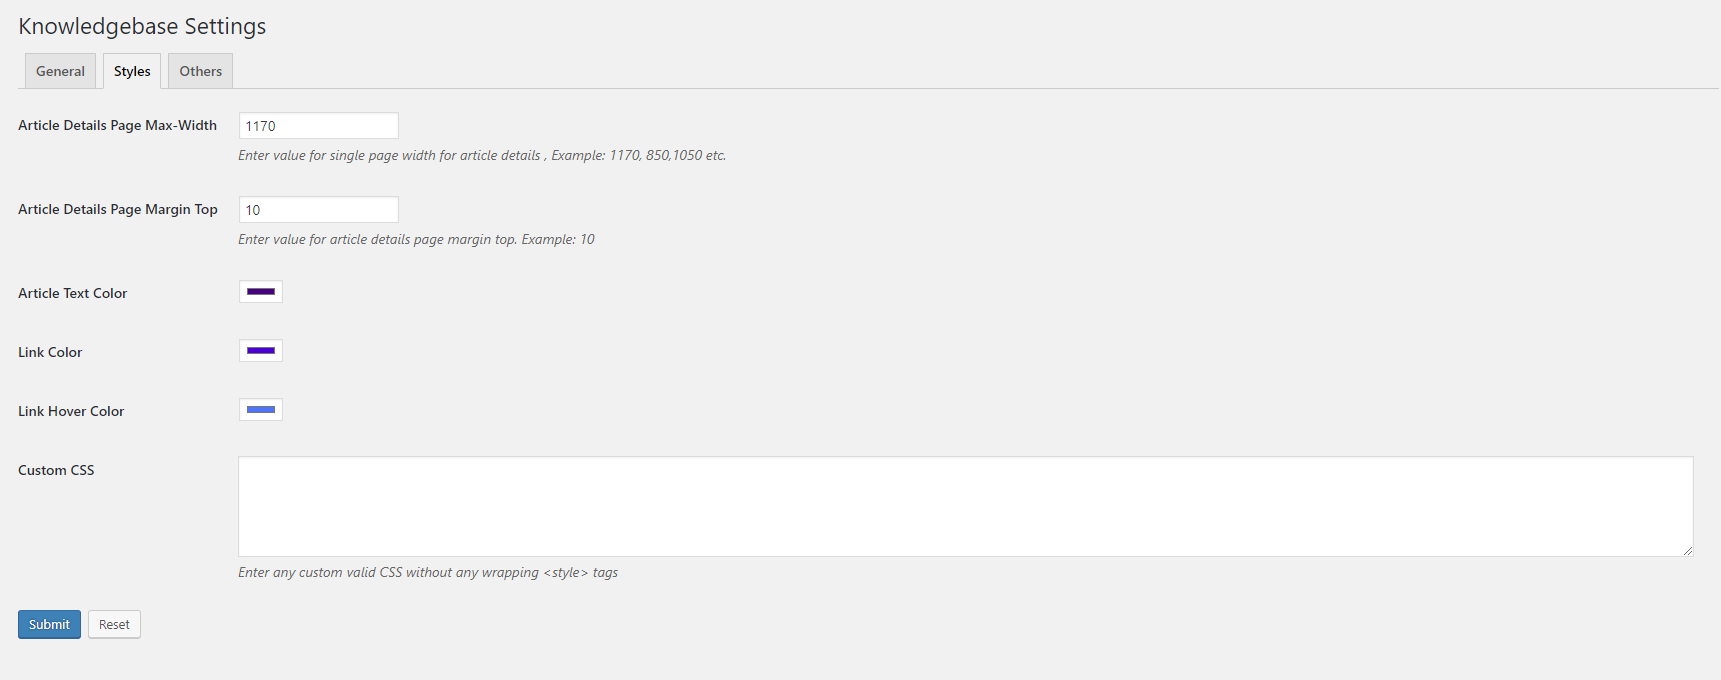
7.3. Style
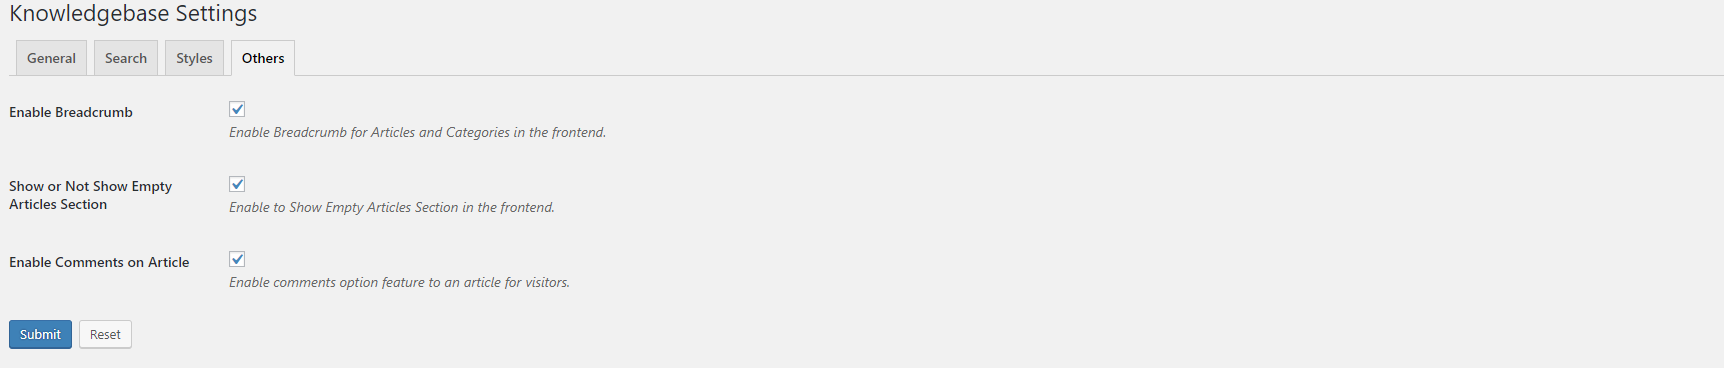
7.4. Others
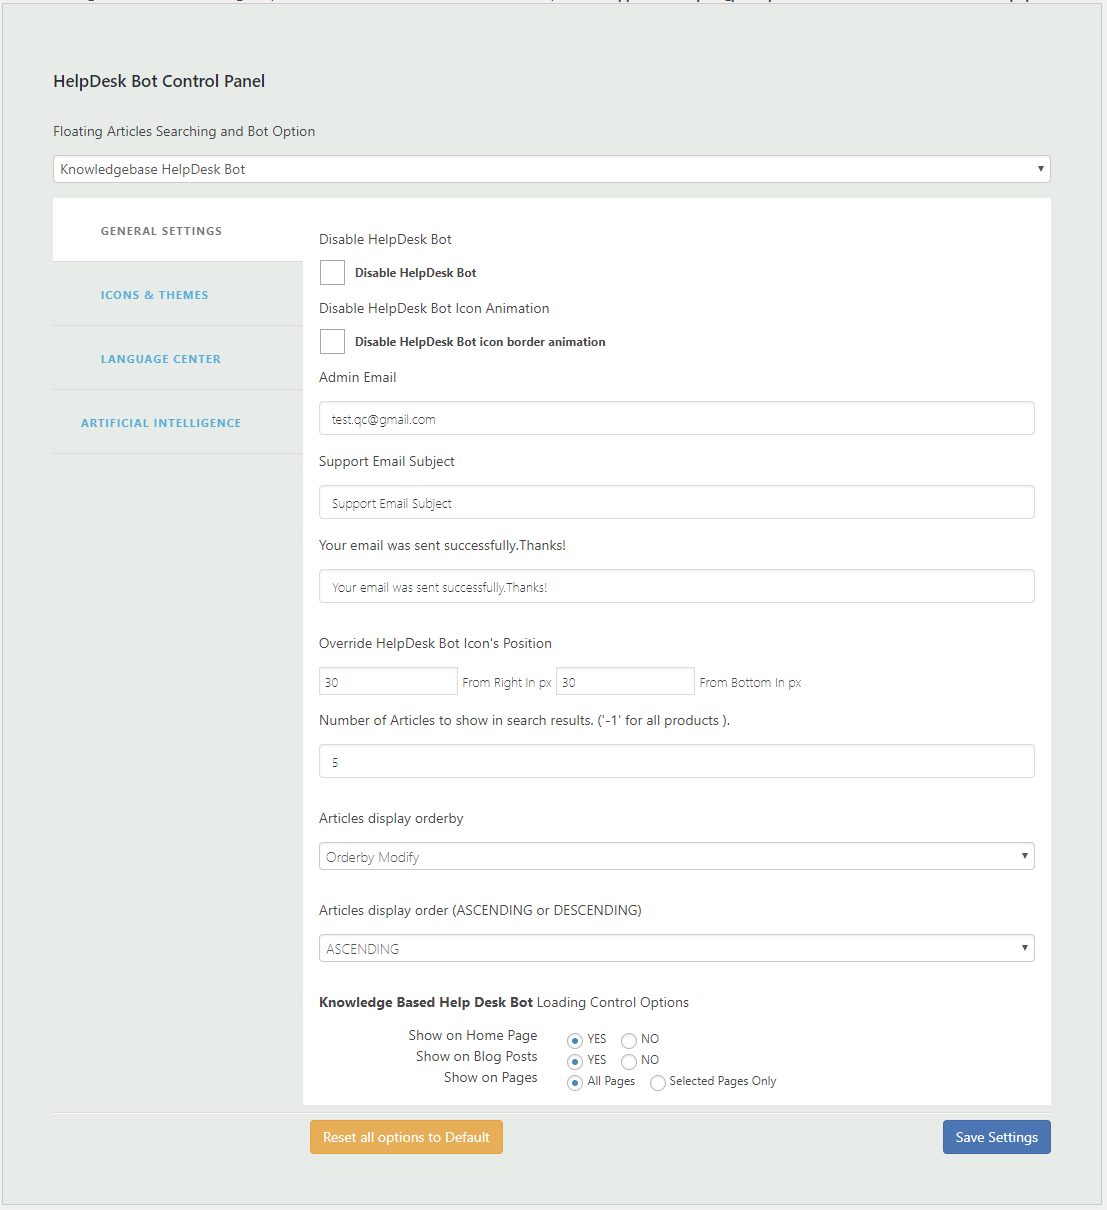
8. BOT SETTINGS
In the top of Bot Settings page, if Floating Articles Searching and Bot Option is Knowledgebase HelpDesk Bot , then
8.1. General
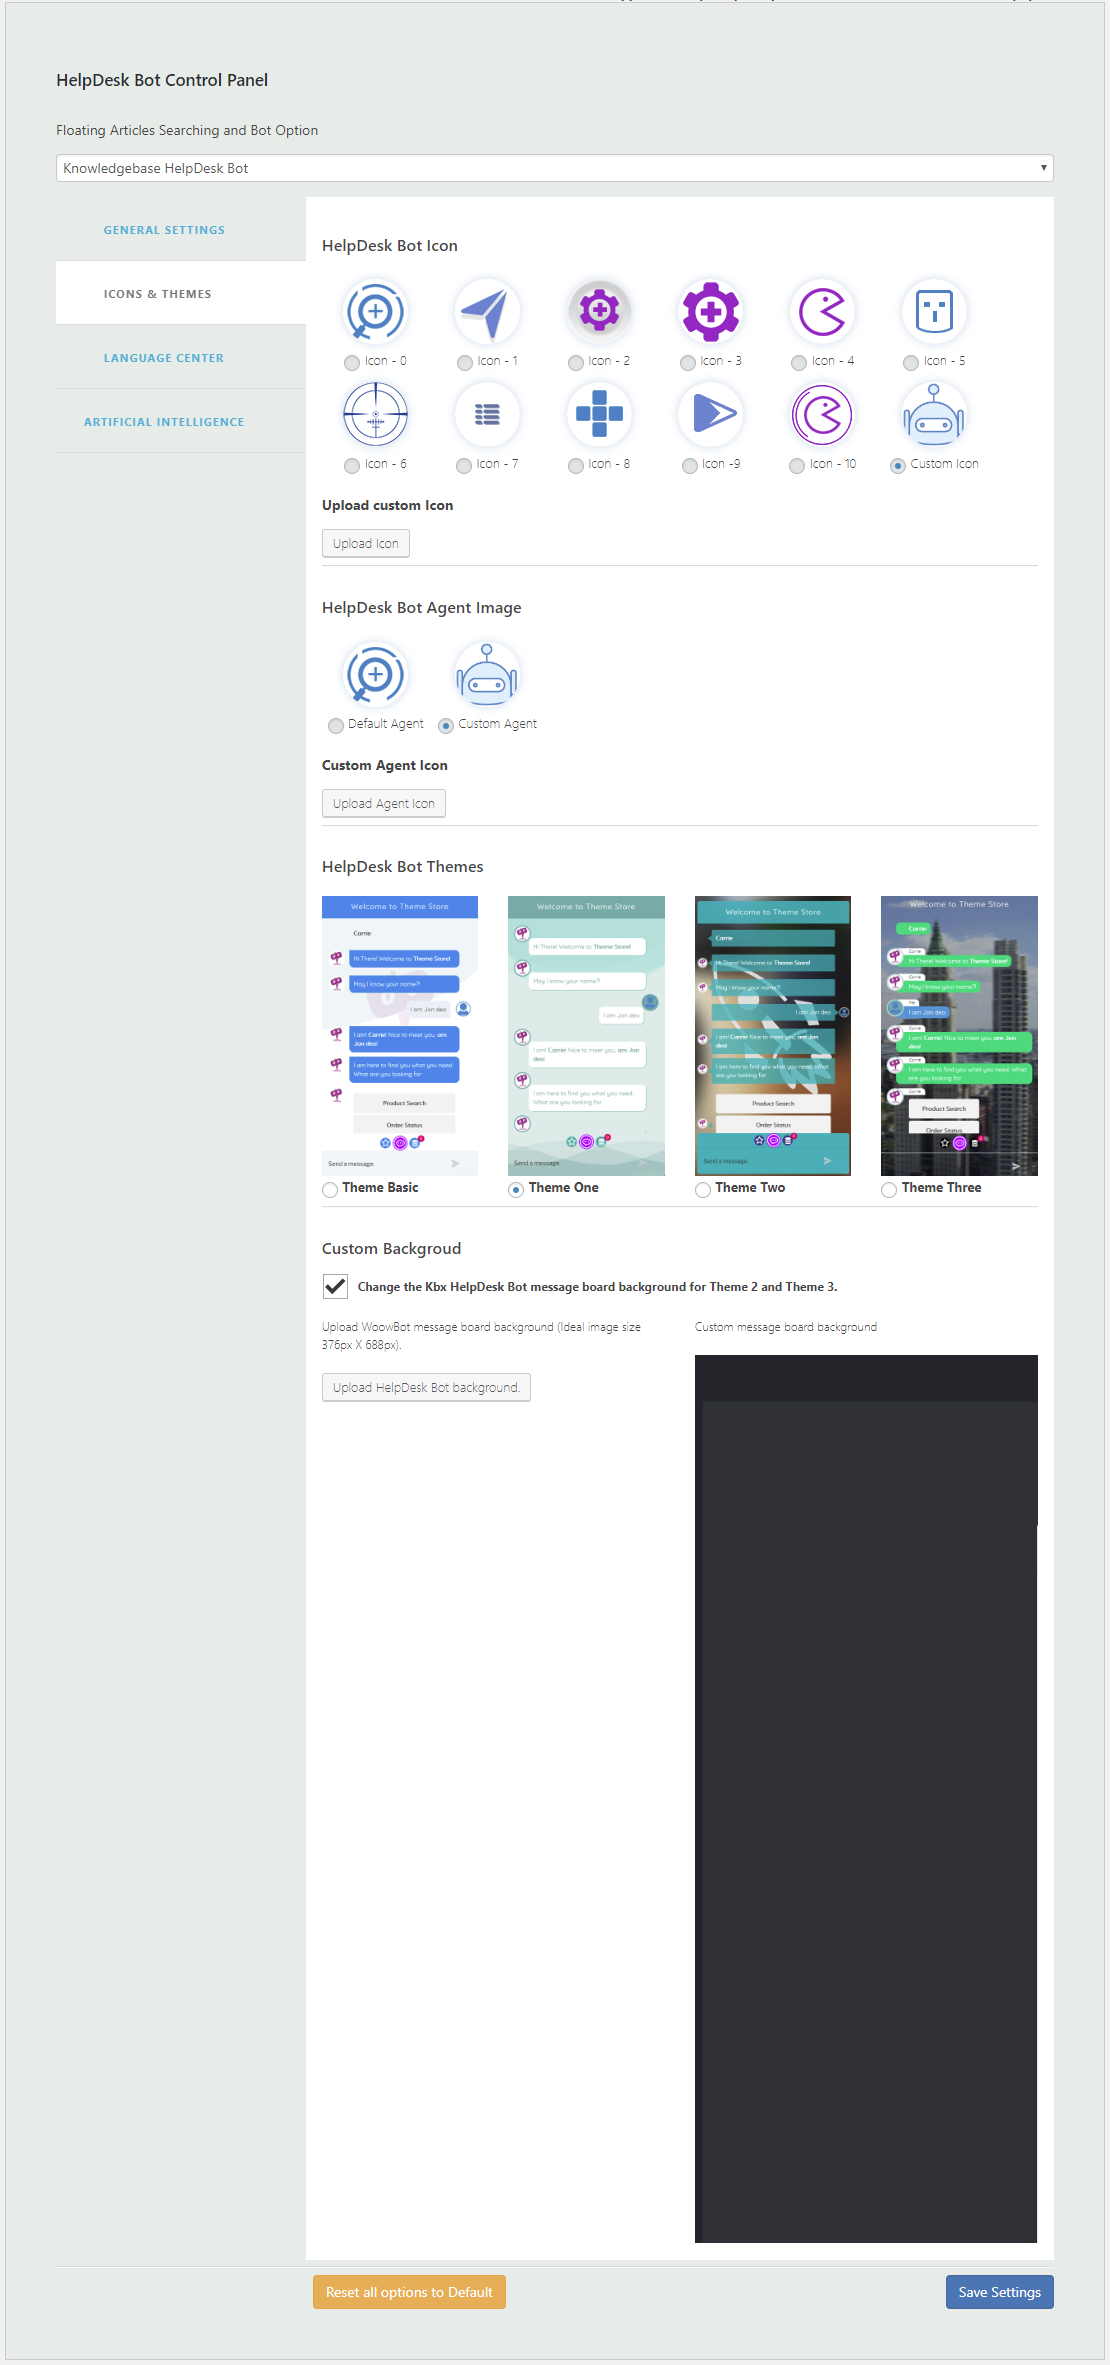
8.2. Icon & Themes
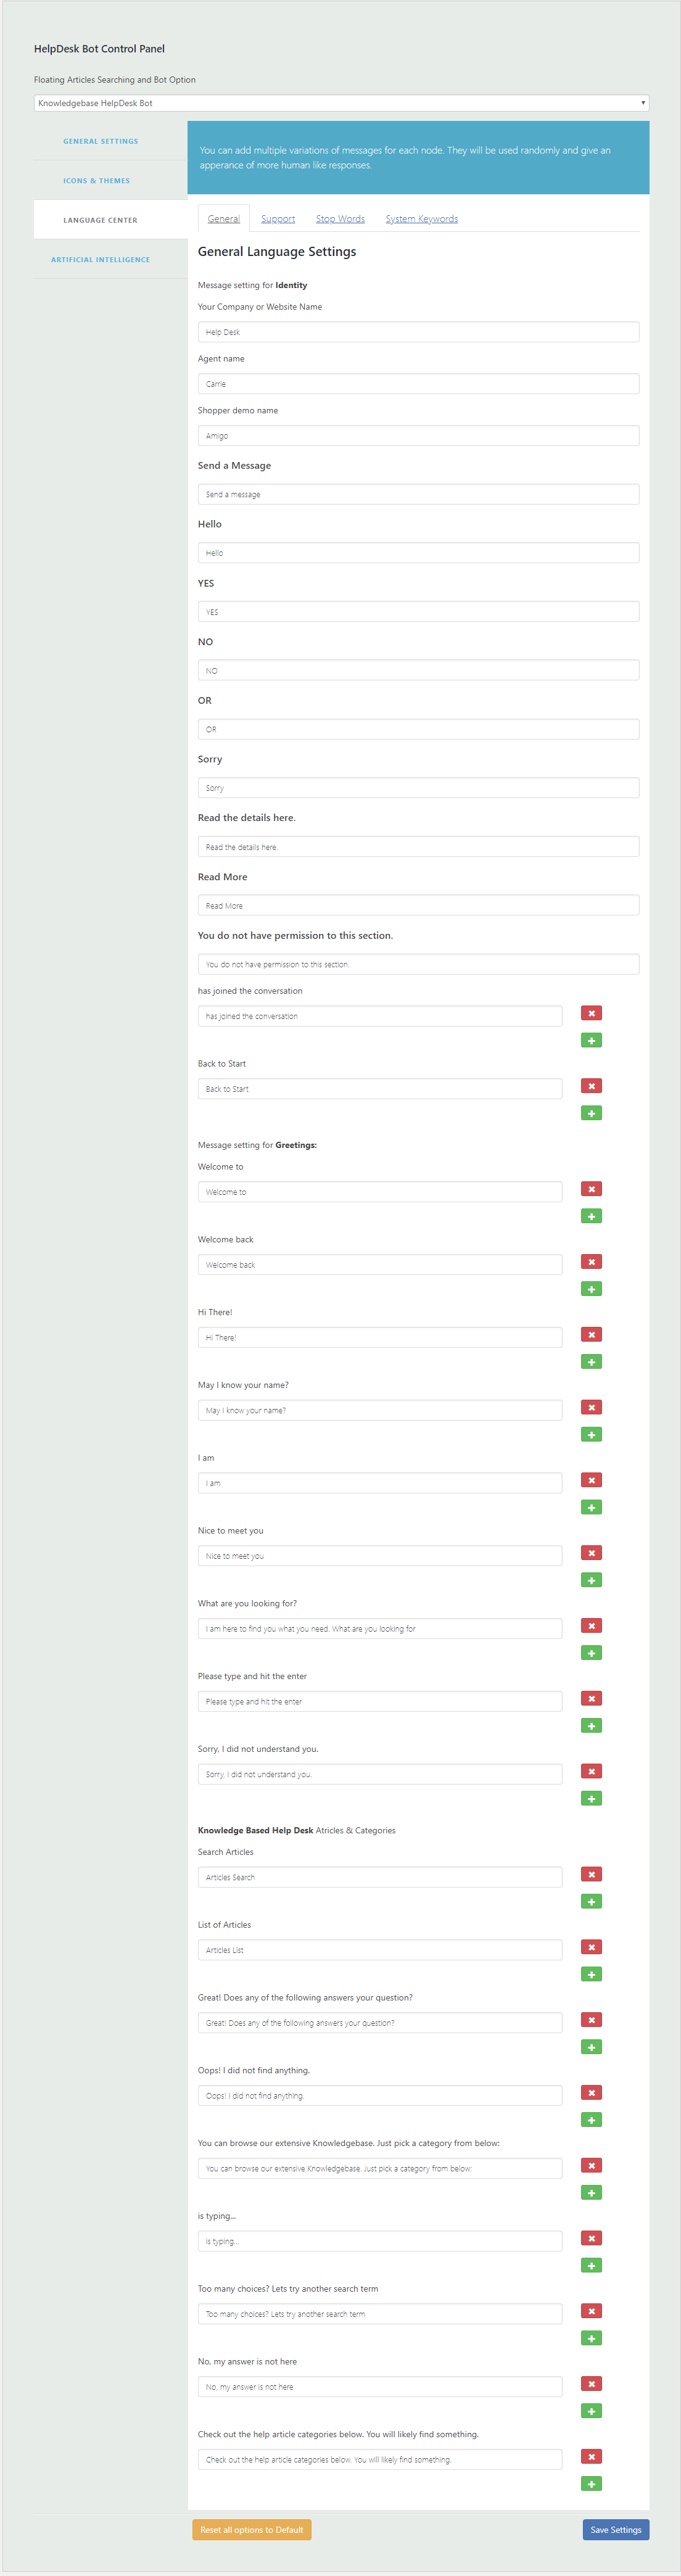
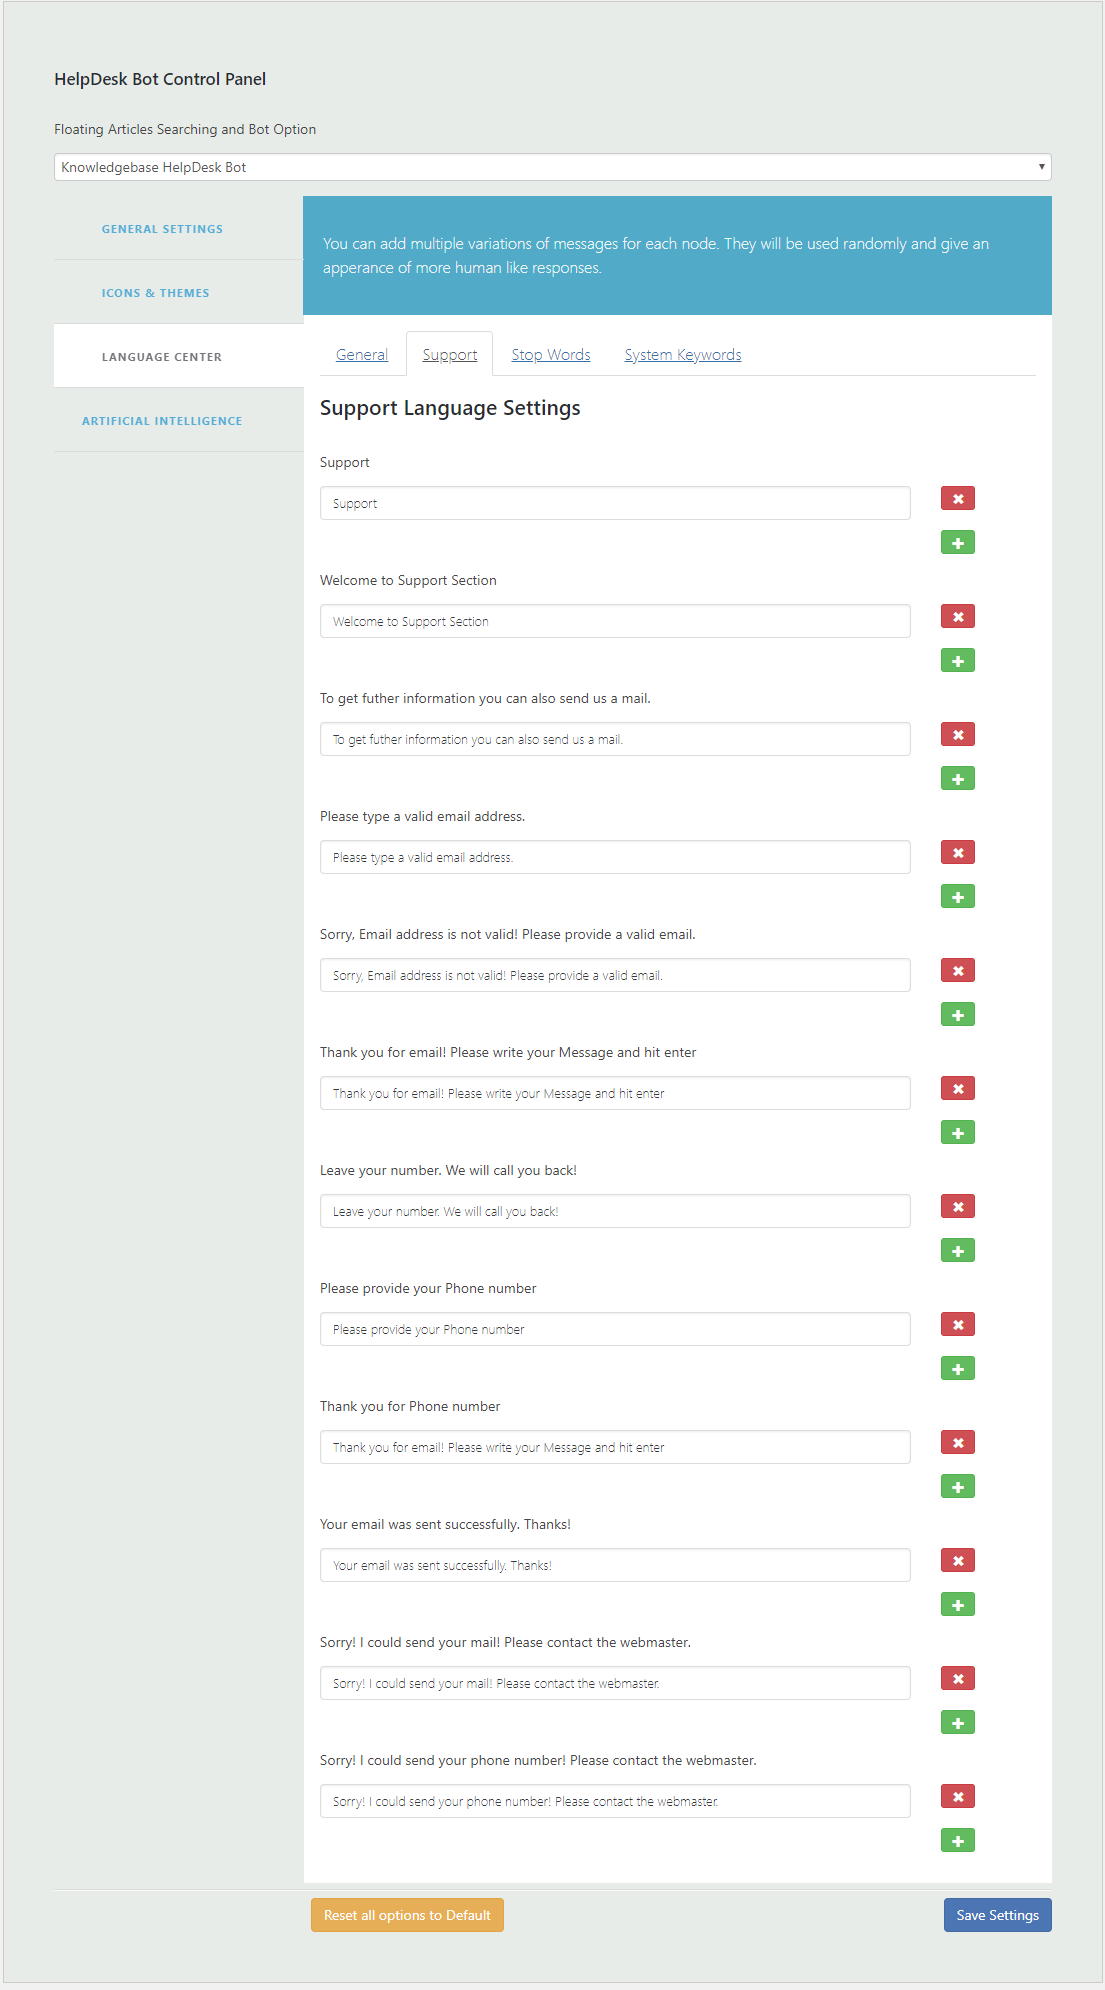
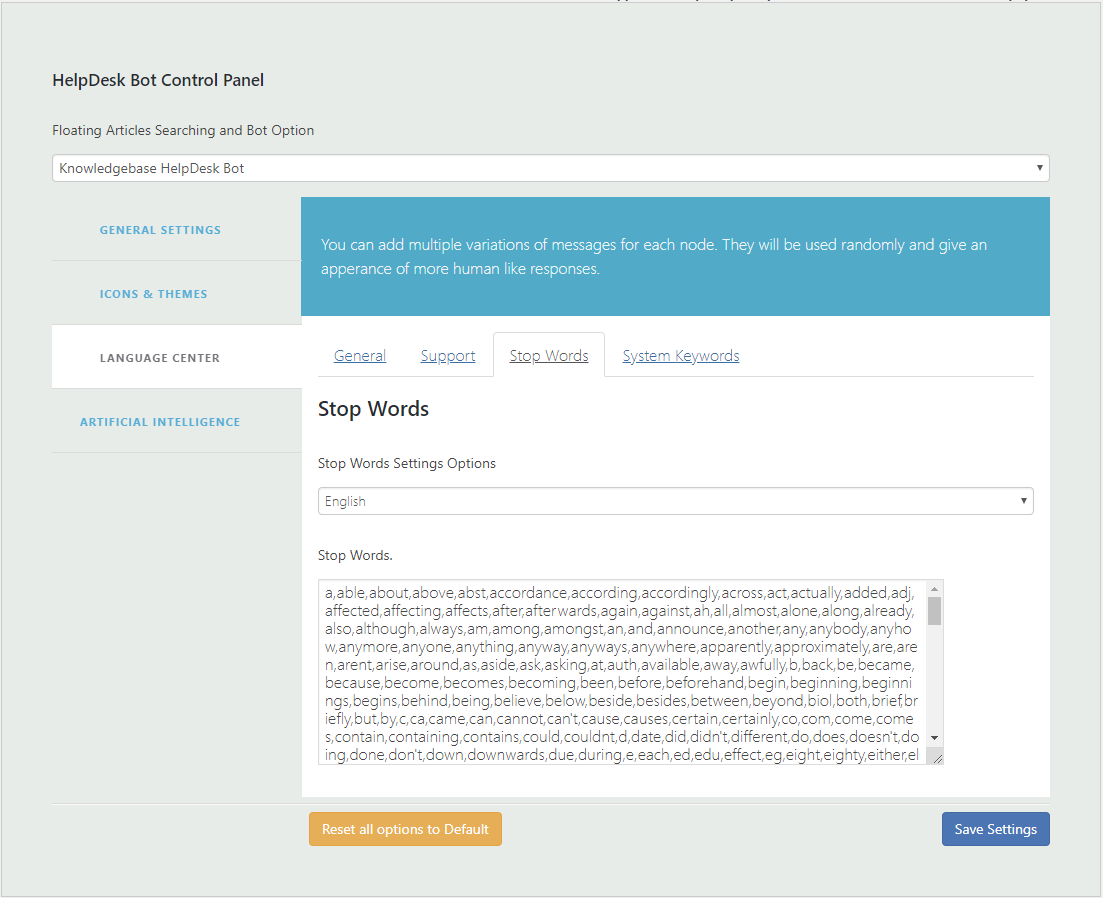
8.3. Language Center

9. SUPPORT
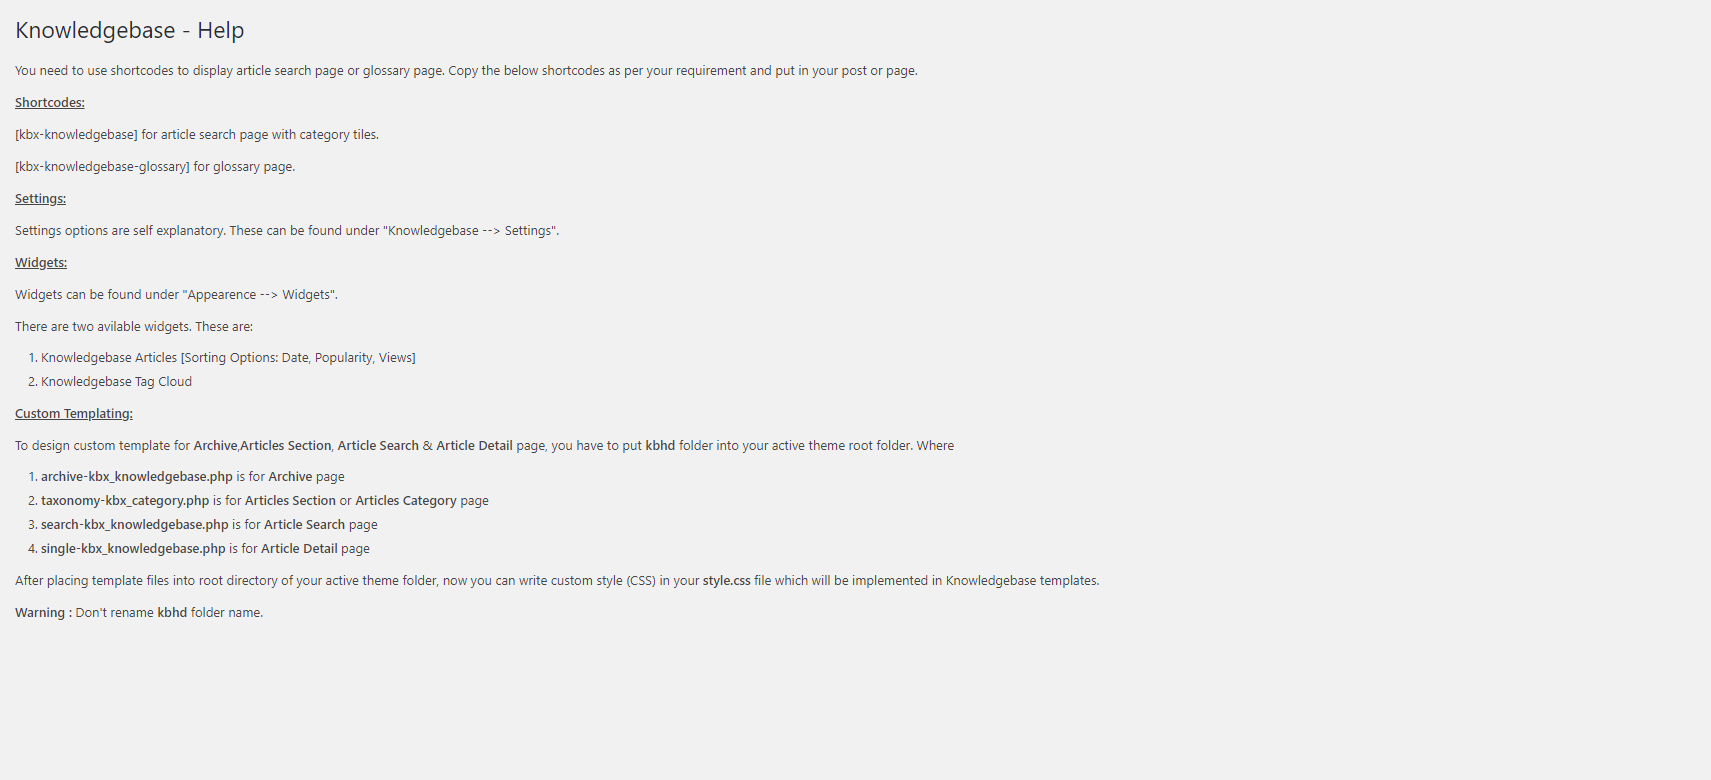
10. HELP
AI and NLP
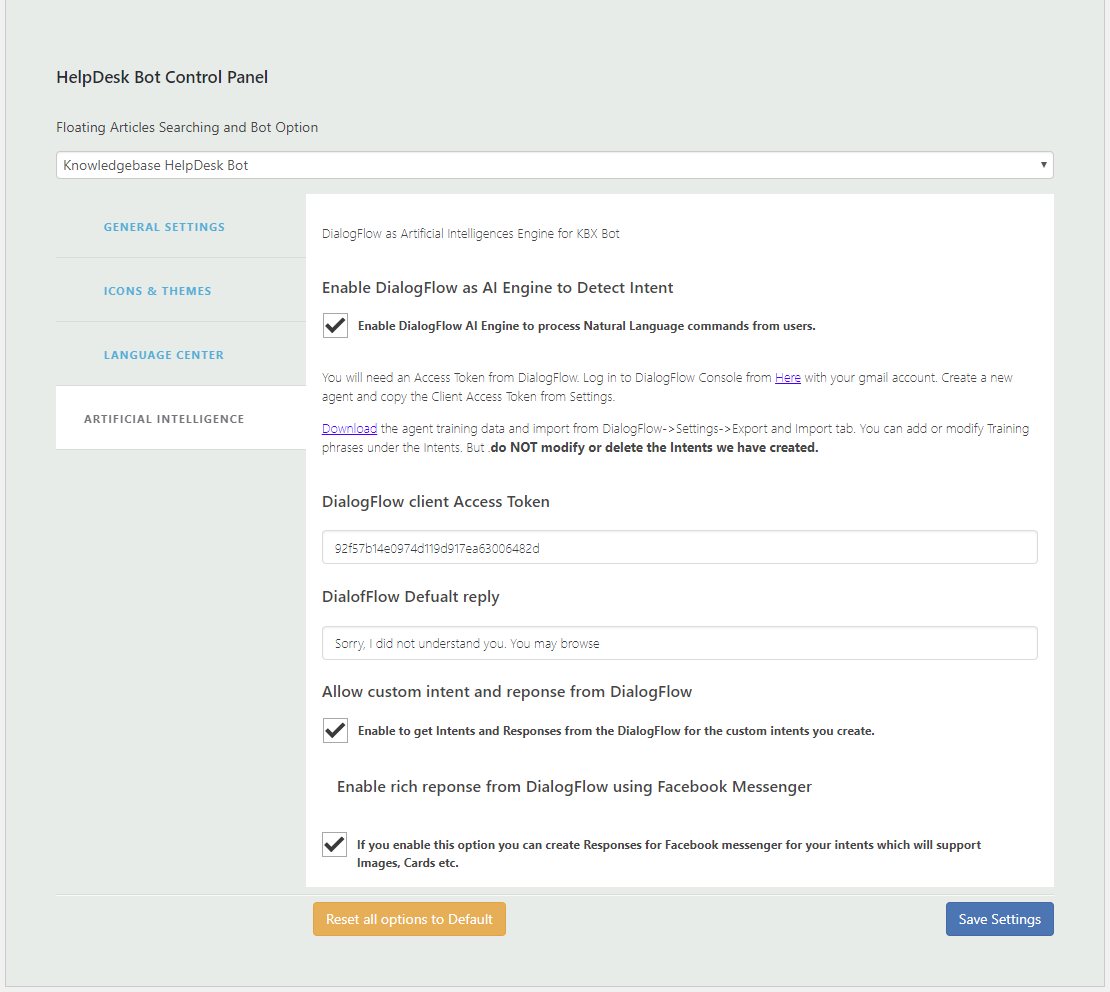
- Enable DialogFlow as AI Engine to Detect Intents and to process users inputs in Natural Language. A fail safe list of buttons will be shown when no intent is matched so the users do not get frustrated.
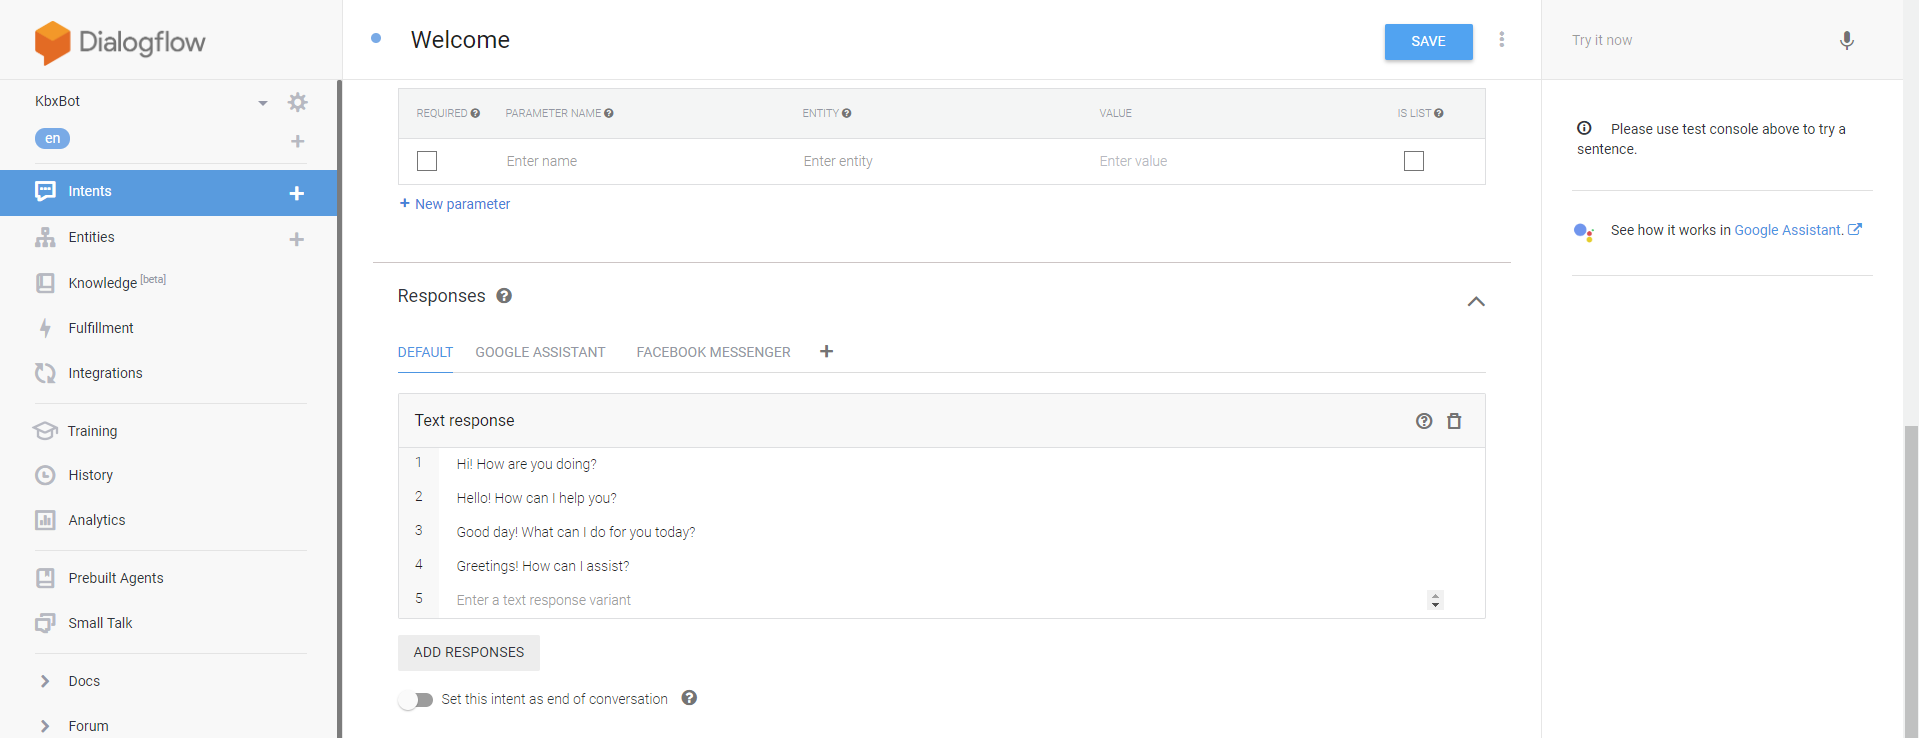
- DialogFlow client Access Token You will need an Access Token from DialogFlow. Log in to DialogFlow Console from Here with your gmail account. Create a new agent and copy the Client Access Token from Settings.
- Import Agent to DialogFlow Download the agent training data (From Kbx Bot Setting page) and import to DialogFlow->Settings->Export and Import tab. You can add or modify Training phrases under the Intents. But .do NOT modify or delete the ready made Intents we have created.
- DialofFlow Defualt reply when no intent is matched is "Sorry, I did not understand you. You may browse below. " Change it to anything else if you want. The bot will then fall back to Start up buttons and premade intents.
- Allow custom intents and reponses from DialogFlow Enable to get Intents and Responses from the DialogFlow for any custom intents you create. Use this feature if you have some basic understanidng of how Natural Language processing and dialog flow works. Kbx Bot will take the user's input and query dialogflow to try and match all the intents including the custom ones. If a custom intent match is found Kbx Bot will display the Response you created for that intent.
-
Enable rich response from DialogFlow using Facebook MessengerIf you enable this option you
can create Response messages for Facebook messenger for your intents which will support Images, Cards etc.
These rich responses will be shown inside the Kbx Bot when intent matches. Quite useful to create cards and
options.
Creating Custom Intent and response on DialogFlow
- Create Intent and Training phrases you need to create an intent for step by step search by clicking on Intents + (Plus) sign from the left panel. You will need to copy this Intent Name exactly and paste in the KBX settings for step by step search.
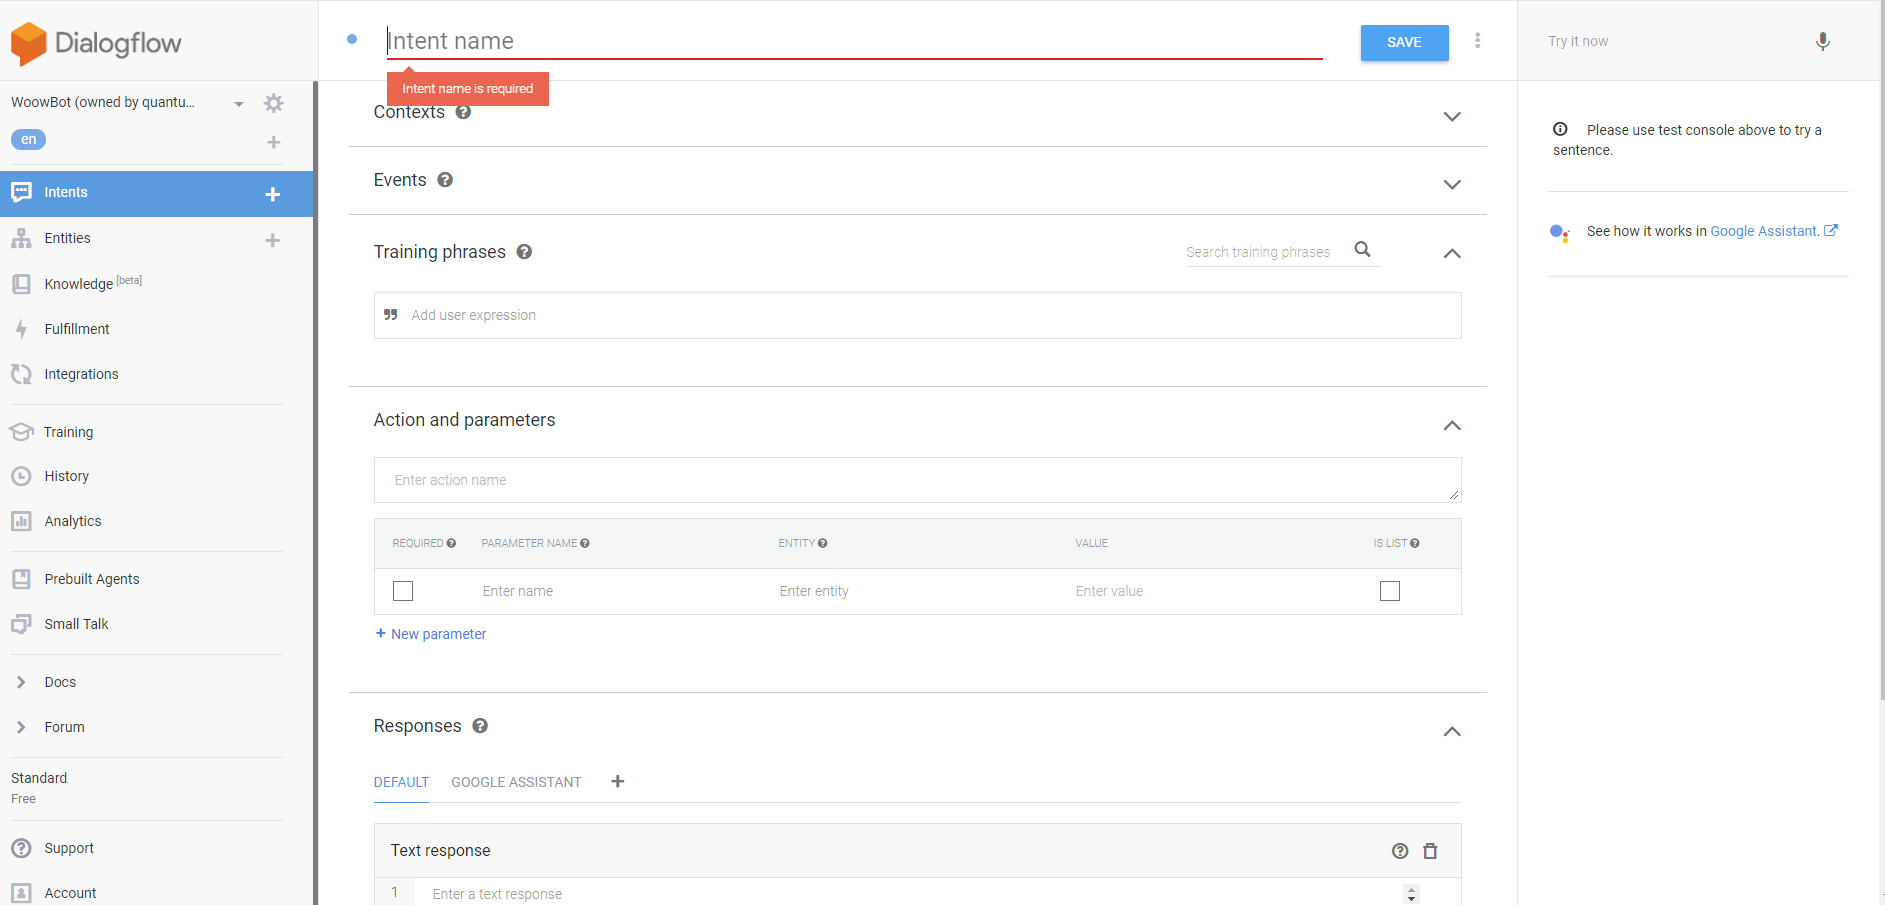
- Intent Reponses
Shortcode
How To Display Knowledgebase Shortcode
Knowledgebase comes with different types of ShortCodes and multiple attribule for shortcode that can be placed anywhere in your WordPress site.
You can shortcode using two way
Using Knowledgebase ShortCode Generator as

Using Knowledgebase shortcode manually as
- [kbx-knowledgebase] for Knowledgebase articels home page.
- [kbx-knowledgebase-articles] for sections article list .
- [kbx-faq] for FAQ page.
- [kbx-knowledgebase-glossary] for glossary page.
- [kbxbot] for Knowledgebase ChatBot.
- [kbx_app] for Knowledgebase ChatBot Mobile App.
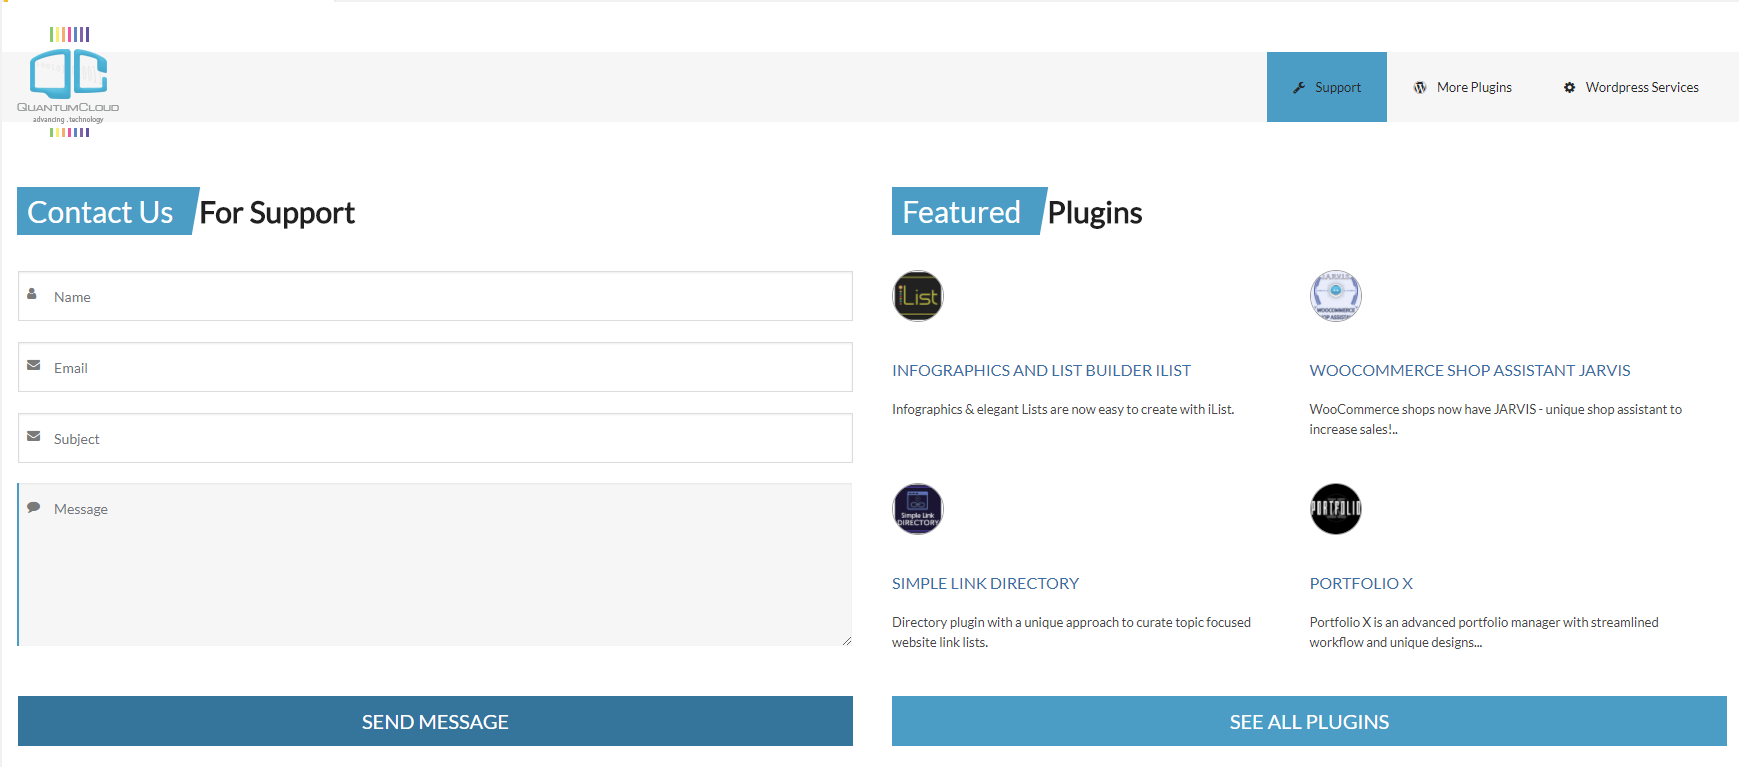
Support
To get priority support, please open a support ticket with us.
Any feedback or feature requests are most welcome. We will try to incorporate your valuable suggestions with our item.
Developed by Professional Web Design and Development Company QuantumCloud
Partner with us if you need any design or development help with your website!